
Sump pump sizing: how to measure, calculate, and pick the right pump
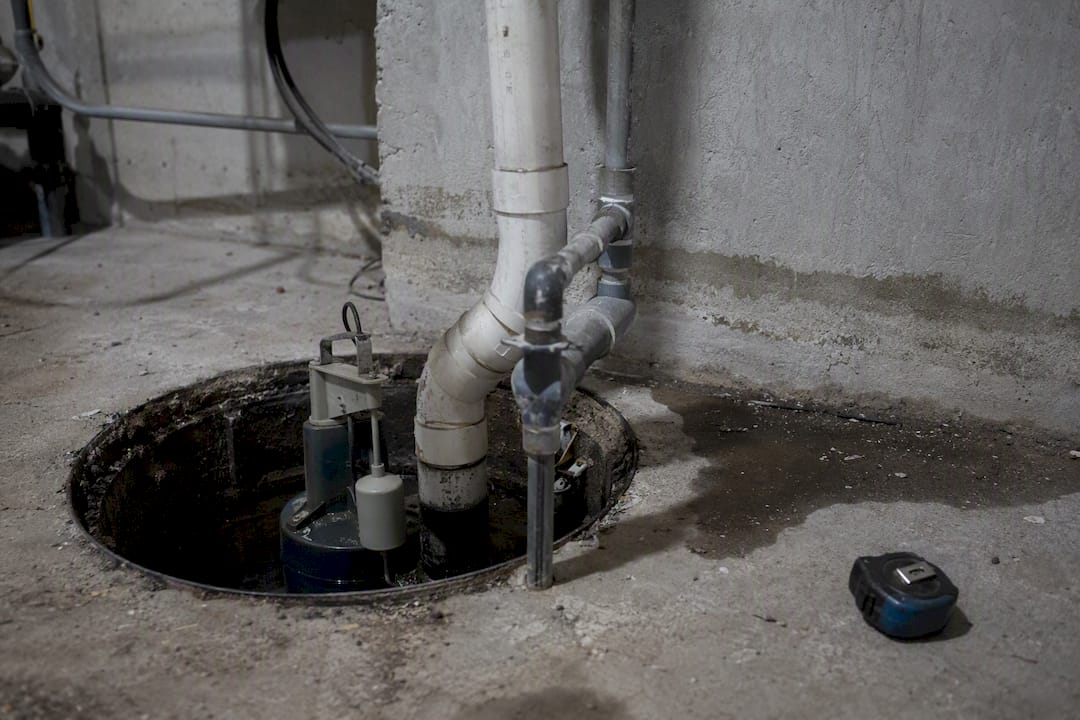
Size a sump pump to the flow you actually measure coming into the pit, not to a horsepower number on a box. Then confirm the pump you’re considering can deliver that flow at that head on its performance curve. Buying too much pump causes short-cycling; buying too little means a flooded basement during the storm that matters most.
Measure actual inflow during rain using the drawdown test to determine gallons per minute, accounting for peak storm conditions with a safety margin.
Calculate total dynamic head by including static lift and friction losses from fittings, pipe diameter, and horizontal run length for accurate pump sizing.
Ensure your basin size and float settings are adequate to prevent short-cycling, which can damage the pump even if the flow rate matches your inlet volume.
Upgrading pipe diameter from 1.5 to 2 inches can significantly reduce friction and often eliminates the need for a more powerful pump.
Consult a professional engineer when TDH exceeds 25 to 30 feet or flow surpasses 3,000 to 4,000 GPH, especially in complex drainage scenarios or projects requiring permits.
Table of Contents
Sump pump sizing checklist: what to measure on-site first
Before you touch a calculator or a pump curve, you need six numbers off your own basin. Skipping this step is the single biggest reason sizing calculations go wrong. Grab a tape measure, a marker, your phone, and a stopwatch, and work through this in order:
Pit diameter and depth. Most residential basins run 18 to 24 inches across; measure yours rather than assuming.
Pump on and pump off elevations. Mark where the float switches engage and disengage, in inches from the pit floor.
Vertical lift to discharge. Measure from the water surface at pump on up to the point where the pipe exits the house or clears the check valve at the top, whichever is higher.
Horizontal run length. Measure the pipe from the point it goes horizontal to where it terminates outside.
Fittings count. Count every 90-degree elbow and any reducers or valves in the line.
Pipe diameter. Most homes run 1.5 inch or 2 inch PVC; check which one you have, since it changes the friction math significantly.
Take photos of each measurement point. A half-inch error on vertical lift barely moves the math, but miscounting elbows or misreading pipe diameter can shift your required pump by a full horsepower band. Write everything down before you touch a sump pump sizing calculator, because most tools ask for these exact inputs and give you a wrong answer if you guess.
How do you measure sump pump inflow accurately?
The drawdown test is the most reliable way to find your actual inflow rate, and it takes about ten minutes. Turn off the pump at the breaker or unplug it, then watch the water rise in the pit and time it.
Running the test:
Mark the current water level with a piece of tape or a pencil line on the pit wall.
Start your stopwatch the moment you shut the pump off.
Let the water rise for 2 to 5 minutes (longer in a slow-filling pit, shorter if it’s rising fast).
Mark the new water level and stop the timer.
Measure the rise in inches and divide by the minutes elapsed to get inches per minute.
Convert that to gallons using your pit’s cross-section: an 18-inch diameter pit holds roughly 1.1 gallons per inch of rise, while a 24 inch pit holds closer to 2 gallons per inch.
Multiply inches per minute by gallons per inch, and you get your inflow in gallons per minute (GPM). A pit rising 3 inches in 4 minutes in an 18 inch basin, for example, works out to about 0.83 GPM, or roughly 50 gallons per hour under those conditions. That number sounds small until you run the test again during an actual rainstorm and watch it triple.
If you’re sizing a pump for a new build with no existing water history, use the drainage-area method instead: multiply the square footage draining to that pit by a conservative peak rainfall rate, then convert the result to GPM. Foundation drainage systems in heavy clay soils or high water table areas should lean toward the higher end of your rainfall assumption rather than the average, because average years aren’t what floods basements.
Pro Tip: Run the drawdown test twice, once on a dry day and once during or right after a heavy rain. The gap between those two numbers tells you how much margin your pump actually needs, and it’s often bigger than homeowners expect.
The drawdown test and 1.5x safety factor form the backbone of every credible sizing method, and skipping straight to a horsepower guess is where most undersized installations start.
What is total dynamic head and how do you calculate it?
Total dynamic head, or TDH, is the real resistance your pump fights against, and it’s almost always higher than the vertical lift alone. TDH equals static lift plus friction losses, and pump manufacturers rate output at specific TDH points on a curve, not at a single flat number.
Static lift is straightforward: measure from the water level at pump on up to the highest point in the discharge line, usually where it exits above grade or clears a check valve.
Friction losses are where people underestimate the math. Every fitting and every foot of pipe adds resistance the pump has to overcome, and it adds up faster than intuition suggests.
Each 90 degree elbow adds roughly 2.5 feet of equivalent head, based on manufacturer sizing guidance that’s become the standard rule of thumb across the industry.
Horizontal pipe run adds friction per 100 feet, and the rate depends heavily on diameter, which is why pipe size matters more than most people assume.
A check valve typically adds a small fixed head loss, usually under a foot, but a partially closed or undersized valve can add more.
A quick worked example: say your static lift is 8 feet, you’ve got three 90 degree elbows (7.5 feet of equivalent head), and a 20 foot horizontal run in 1.5 inch pipe adding another 2 feet of friction. Your TDH comes out to roughly 17.5 feet, not the 8 feet a lot of homeowners assume when they only measure the vertical drop.
That gap matters because pump output falls as head rises. A pump rated for 4,000 gallons per hour (GPH) at zero head might deliver closer to 2,200 GPH at 17.5 feet of TDH. This is the single most common source of undersized installations: someone reads the zero-head number on the box, assumes that’s what they’ll get, and installs a pump that can’t keep pace once the real head is applied. Upgrading from 1.5 inch to 2 inch discharge pipe can cut friction losses by roughly 30 to 40 percent, which often lets a smaller, cheaper pump meet the same duty point that would otherwise need a bigger motor.
How pit size and float settings prevent short-cycling
Short-cycling happens when a pump starts and stops too frequently, and it’s a basin problem far more often than a pump problem. The math is simple: usable drawdown volume divided by pump flow rate gives you run time per cycle, and if that number is too small, the motor is starting dozens of times an hour instead of a handful.
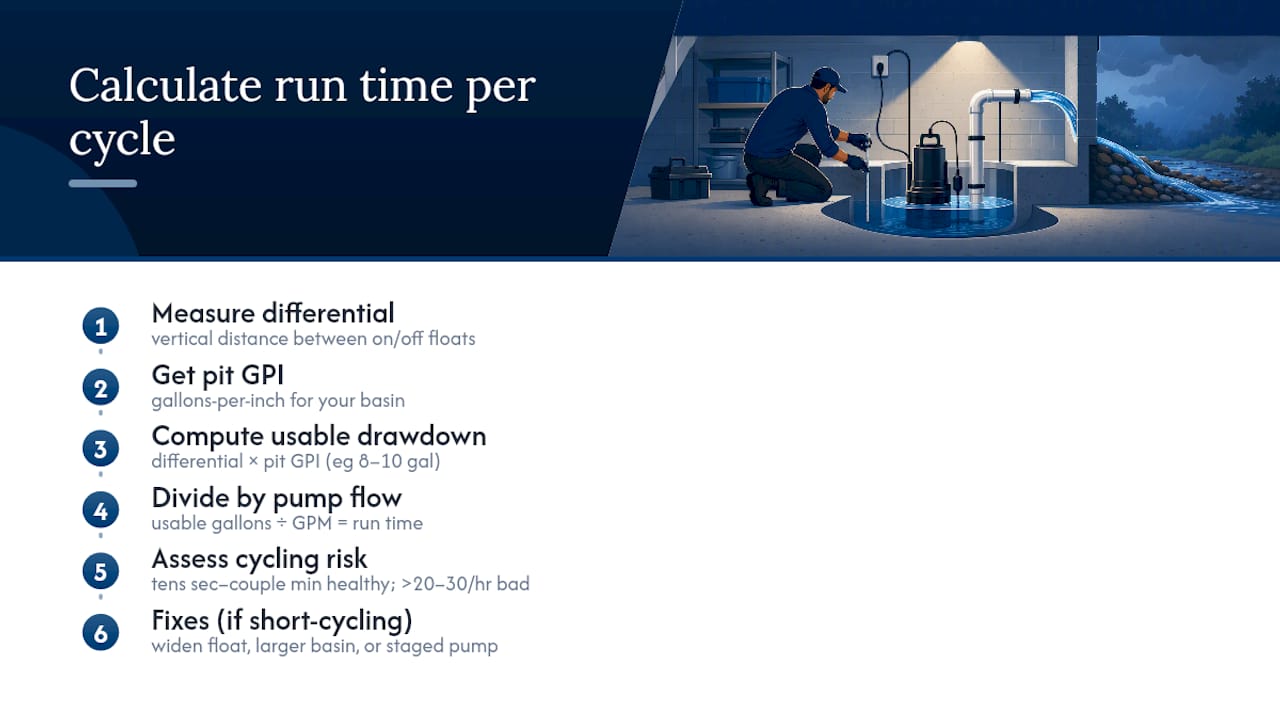
To calculate usable drawdown, take the vertical distance between your pump-on and pump-off marks and multiply it by your pit’s gallons-per-inch figure. An 18 inch by 24 inch pit holds roughly 26 gallons total, but usable drawdown is only the portion between the float settings, often just 8 to 10 gallons in a basin with a tight differential.
Healthy cycling looks like runs lasting anywhere from tens of seconds to a couple of minutes, not rapid five-second bursts. During an active rain event, count starts per hour: if you’re seeing more than 20 to 30 cycles an hour, something needs to change, because that pace burns out motors well ahead of their rated lifespan.
Fixes for short-cycling rarely mean buying a bigger pump; in fact, a bigger pump usually makes the cycling worse, not better. A larger basin, a wider float differential, or a second pump staged to handle overflow all lengthen cycle time without touching the motor size. Short-cycling is fundamentally a storage and float-control problem, and treating it that way saves both money and equipment life.
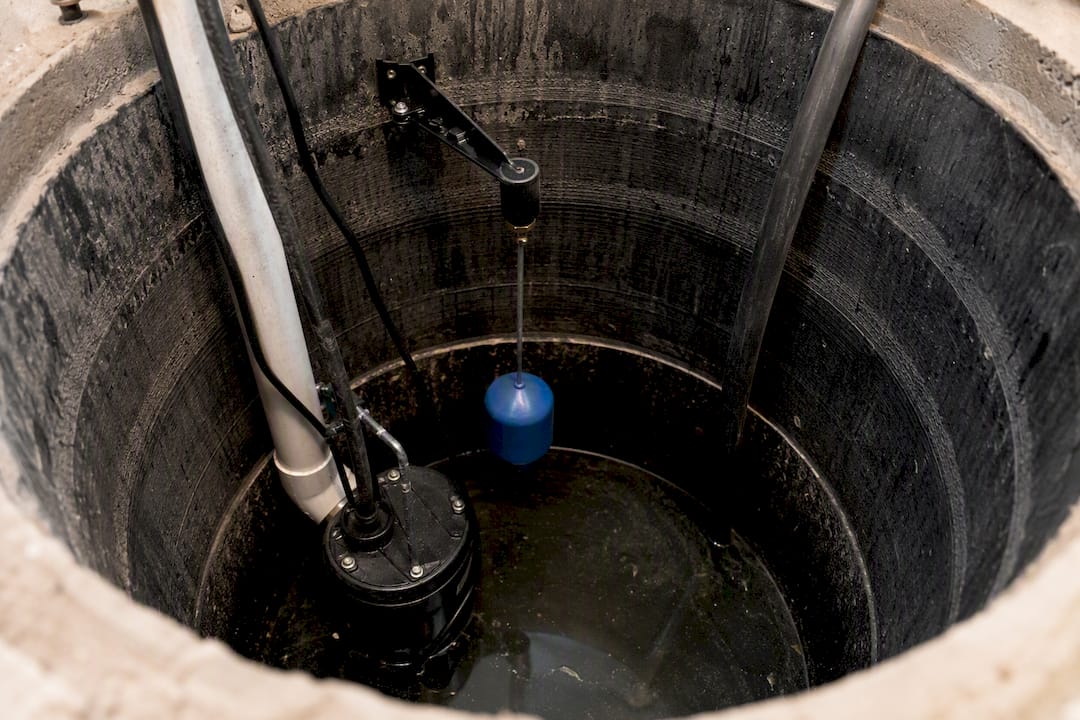
Pro Tip: If your current pump short-cycles constantly but keeps up with the water fine, don’t downsize. Widen the float differential or swap to a bigger basin first. You’ll often solve the problem without losing capacity.
How much pump capacity do you actually need?
Take an inflow of 15 GPM measured during a rain event. Multiply by 60 to get 900 GPH, then by 1.5 for a safety margin, and your target becomes 1,350 GPH at your calculated TDH.
Horsepower bands give you a rough starting point, but they mean nothing without checking the curve:
1/4 to 1/3 HP: typical for smaller basins with modest lift, under roughly 10 feet of TDH, and inflow under 2,000 GPH.
1/2 HP: the common choice for TDH in the 10 to 20 foot range with moderate inflow, and it is the size that shows up most often in residential sizing guides.
3/4 HP and above: needed when TDH climbs past 20 feet, when horizontal runs are long, or when required flow pushes past 3,000 to 4,000 GPH.
Above that threshold, or when TDH gets into the 25 to 30 foot range, a single residential pump often can’t meet the duty point at all, and that’s when dual pumps in parallel or a purpose-built high-head unit become the real answer.
Decision checklist for choosing between 1/3, 1/2, and 3/4 HP:
If TDH is under 10 feet and required GPH is under 2,000, start with 1/3 HP and verify on the curve.
If TDH is 10 to 20 feet or GPH is 2,000 to 3,500, check 1/2 HP units first.
If TDH exceeds 20 feet or GPH exceeds 3,500, look at 3/4 HP or dual-pump configurations.
In every case, confirm the pump’s rated output at your specific TDH, not its zero-head rating, before buying.
Worked sump pump sizing examples you can copy
These three examples walk through the same math you’d run on your own basin, from drawdown test to final pump selection.
Example 1: Small basement, short discharge run.
Drawdown test: pit rises 2 inches in 3 minutes in an 18 inch pit (1.1 gal/inch) = 0.73 GPM.
Convert to GPH: 0.73 x 60 = 44 GPH, then apply 1.5x safety factor = 66 GPH. This is a very light load, so round up for planning purposes to account for peak storms, landing closer to 1,200 to 1,500 GPH of design capacity.
TDH: static lift of 6 feet, one elbow (2.5 feet), 10 foot horizontal run in 1.5 inch pipe (roughly 1 foot friction) = 9.5 feet TDH.
Curve check: a 1/3 HP pump delivering 1,800 GPH at zero head typically still clears 1,400 to 1,500 GPH at 9.5 feet, comfortably above the design target.
Result: 1/3 HP is appropriate here, and there’s no reason to upsize.
Example 2: Long discharge run with multiple elbows.
Drawdown test: pit rises 5 inches in 4 minutes in a 22 inch pit (roughly 1.6 gal/inch) = 2 GPM.
Convert: 2 x 60 = 120 GPH, x 1.5 = 180 GPH minimum, but the pit’s rain-event peak reading came in at 6 GPM (360 GPH x 1.5 = 540 GPH). Use the peak reading for sizing.
TDH: static lift of 9 feet, five elbows (12.5 feet), 40 foot horizontal run in 1.5 inch pipe (roughly 4 feet friction) = 25.5 feet TDH.
Curve check: at 25.5 feet, most 1/2 HP pumps drop well below the required flow. A 3/4 HP unit or a switch to 2 inch discharge pipe (cutting friction by roughly a third) brings TDH down enough for a 1/2 HP pump to work.
Result: this is the scenario where a $30 pipe upgrade solves a problem a $150 pump upgrade would only partially fix.
Example 3: High-head or near-commercial demand.
Drawdown test during peak storm: 10 GPM sustained inflow.
Convert: 600 GPH x 1.5 = 900 GPH minimum, but sustained high inflow over a long duration pushes design target to 4,500 GPH to avoid basin overflow between cycles.
TDH: static lift of 22 feet (multi-level discharge routing), eight elbows (20 feet), long horizontal run adding another 6 feet = 48 feet TDH.
Result: no single residential pump reliably clears 4,500 GPH at 48 feet of TDH. This calls for two pumps staged in parallel or a purpose-built high-head unit, and it’s the point where calling a professional stops being optional.
Example | Inflow (GPM) | TDH | Recommended pump |
1: Short run | 0.73 | 9.5 ft | 1/3 HP |
2: Long run, many elbows | 6 (peak) | 25.5 ft (or lower with 2" pipe) | 1/2 to 3/4 HP |
3: High head | 10 (sustained) | 48 ft | Dual pumps or professional design |
Calculator workflow checklist: enter pit diameter, drawdown reading in inches per minute, static lift in feet, pipe diameter, elbow count, and horizontal run length. Verify the output GPH against the pump curve at your calculated TDH before buying anything, since a pump’s rated flow drops sharply as head increases, and no calculator output replaces that final curve check.
Discharge piping and reliability: what actually fails first
Pipe diameter and check-valve placement decide how much of your pump’s rated output you actually get to use, and they’re the cheapest part of the system to get right.
Pipe diameter: 2 inch pipe cuts friction loss by roughly 30 to 40 percent compared to 1.5 inch for the same flow, which sometimes means the difference between needing 3/4 HP and getting by with 1/2 HP.
Check-valve placement: install it close to the pump, and support the vertical column above it. A trapped column of standing water between checks adds head every cycle and increases backflow risk if the valve fails.
Freeze protection: route discharge lines to daylight with enough slope to drain fully, and avoid low spots where standing water can freeze and block the line mid-winter.
Termination point: discharge at least 6 to 10 feet from the foundation, away from walkways that’ll ice over, and never into a sanitary sewer connection.
Routine checks: test the pump under load a few times a year by pouring water into the pit and watching the full cycle, listening for grinding, and confirming the check valve seats properly.
Pro Tip: If your pump seems undersized after doing the math, check the pipe diameter before buying a bigger motor. A 2 inch upgrade is often a cheaper, more reliable fix than jumping a horsepower band.
When does sump pump sizing need a professional engineer?
DIY sizing covers most single-family basements well, but certain situations move past reasonable homeowner judgment and into territory where a stamped design protects you. Bring in a professional when your calculations show TDH above 25 to 30 feet, required capacity above 3,000 to 4,000 GPH, or when the project is part of a renovation that triggers a permit review.
Complex site drainage, such as a property with a high water table, multiple foundation drain connections, or grading that channels significant surface water toward the foundation, also warrants an engineered review rather than a calculator estimate. So does any project where the sump pump is one component of a larger mechanical or drainage system tied to permit approval.
A professional review from a firm like Rnengineering typically delivers a verified TDH calculation cross-checked against site conditions, pipe-sizing and routing recommendations that account for the full building layout, and permit-ready drawings that coordinate with civil or site drainage requirements. That coordination matters most on multi-unit or commercial-scale projects, including elevator sump pump sizing, where pit design, discharge routing, and code compliance intersect in ways a residential calculator was never built to handle.
Before requesting an assessment, gather your drawdown test results, photos of the pit and discharge routing, a basic site plan, and every measurement from your on-site checklist. That documentation turns a first conversation into a working design session instead of a re-measurement visit, and it’s exactly the kind of preparation that speeds up plumbing and drainage design work when a project moves toward permit submission.
Sump pump calculators and manufacturer tools worth trying
A handful of online tools cover most of the sizing math for you, provided you feed them accurate field measurements rather than guesses.
Basin and head calculators ask for pit diameter, drawdown reading, static lift, pipe diameter, and elbow count, then return required GPH and a suggested horsepower band.
Manufacturer curve tools let you cross-check a specific pump model’s output at your calculated TDH, which is the step most generic calculators skip.
Friction-loss calculators apply Hazen-Williams style formulas for longer or more complex runs, useful when your horizontal distance exceeds 50 feet or you’re mixing pipe diameters.
Whatever tool you use, treat its horsepower suggestion as a starting point, not a final answer, and always pull up the specific pump’s performance curve to confirm it hits your GPH target at your actual TDH. Save your inputs and the calculator’s output. Bringing that paperwork to a contractor or engineer turns a vague “I think I need a bigger pump” conversation into a five-minute confirmation.
A practical take on sump pump sizing mistakes
Most sizing failures aren’t math errors, they’re measurement errors dressed up as math errors. Someone runs a calculator with a guessed pipe diameter or skips the drawdown test entirely and goes straight to “1/3 HP is standard,” and the number that comes out the other end is confident-sounding nonsense.
The horsepower rule of thumb persists because it’s easier than measuring, not because it’s reliable. A pump rated at 1/3 HP might handle one basement fine and fail completely in another with a longer discharge run or more elbows, and the difference has nothing to do with the motor.
If you’re deciding between spending money on a bigger pump or fixing your pipe, fix the pipe first in most cases. A 1.5 inch to 2 inch upgrade is cheap, permanent, and often solves the exact problem people try to solve with more horsepower. Three things worth checking this weekend: run a drawdown test during the next decent rain, count your elbows, and measure your pit’s usable drawdown between float settings. Those three numbers will tell you more than any calculator will guess on your behalf.
— M
Get a professional sump pump and drainage review from Rnengineering
Rnengineering is the alternative to guesswork sizing when your basement drainage is part of a bigger renovation, a permit-triggering project, or a site with complicated grading. Instead of a generic calculator estimate, you get a verified total dynamic head calculation checked against your actual site conditions, pipe-sizing recommendations, and permit-ready drawings that coordinate cleanly with the rest of your mechanical design.

Before reaching out, pull together your drawdown test numbers, photos of your pit and discharge routing, and any calculator outputs you’ve already run. That’s exactly the documentation our team uses to move fast on a plumbing and drainage design package for permit submission or construction coordination. If your project also touches HVAC or fire protection scope, our broader design services cover that coordination under one roof. Ready to move forward? Submit an inquiry and we’ll walk through your measurements together.
Sources
The sump pump sizing calculator referenced throughout this guide covers the drawdown test and safety factor math in more detail, while Zoeller’s sizing guidance breaks down friction losses per fitting. For pump-curve mapping across common horsepower bands, see Plumber Calc’s sizing tool. On the health side, NIOSH’s guidance on indoor mould hazards explains why getting this calculation right protects more than your foundation.
Recommended


Comments